Getting Started with RealmYour Invitation Email.
You should have received a personalized invitation to claim your Realm profile in your email. If you have not yet received your Realm invitation, please email the church office at [email protected] or call 479-782-5068. Set up a password. First, you will be prompted to set up a password. We strongly recommend choosing a password that is unique to this account. If you are having trouble setting up a password, please check to be sure it meets Realm’s password criteria. Verify your email. After setting up your password, you will receive a second email from Realm. This will verify your email for security reasons. Click the link to verify your email and you will be taken to your Realm account. You may be asked to verify your birthdate as well. |
Quick Tutorials
Frequently Asked Questions
Is Realm secure?
Realm is safe, private, and secure. Realm is not a social network open to anyone; our online community is only made up of the people in our church. Realm is a part of ACS Technologies, which is the largest provider of church database software and uses bank level, 128-bit encryption.
Who can see my information?
Only members of Fort Smith First United Methodist Church (FSFUMC) who have been invited to join Realm may log in. Your information is never public or searchable on the Internet. You have complete control over who can see your contact and personal information. Any information you elect to make visible to our church community is always protected behind a password-required login.
Who can see my child’s information?
For safety reasons, sharing contact and personal information for children under 18 is limited. Parents determine whether or not to display their child’s name in the church directory.
Who can see my financial information?
Your financial information is only visible to you, our Finance Assistant, and our Business Administrator. Some authorized staff members have access to other information associated with your profile (e.g. baptism dates, phone numbers), but they cannot view your financials.
Check Your Profile for Accuracy
Please take a moment to be sure the information associated with your profile is correct and up to date.
How to view your profile
Mobile View
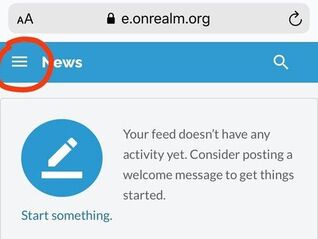
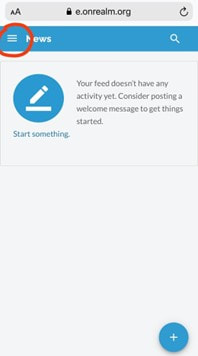
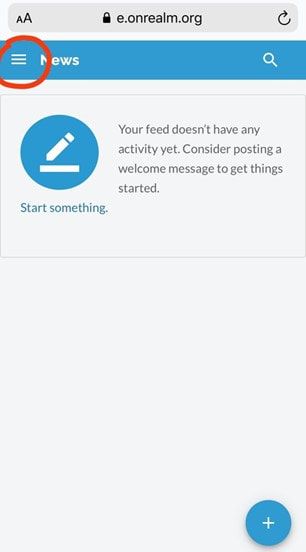
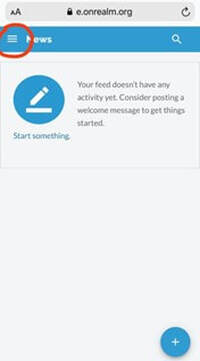
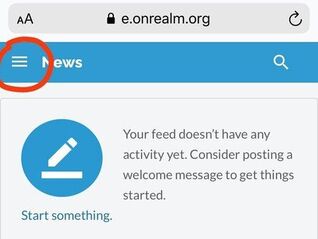
1. On your mobile device or tablet, tap the “☰” menu at the top left corner of your screen.
How to view your profile
Mobile View
1. On your mobile device or tablet, tap the “☰” menu at the top left corner of your screen.
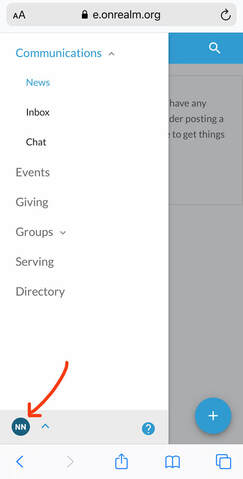
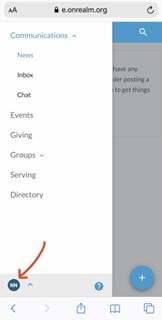
2. At the bottom of the expanded menu, you will see a circle with your initials in it. Tap this circle.
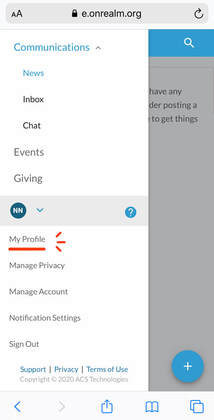
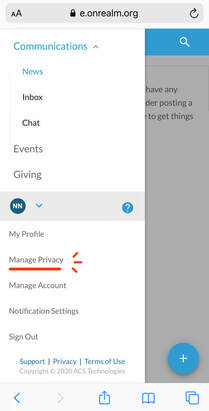
3. At the top of the expanded menu, tap My Profile. This will take you to your profile page. On your profile page, you can select the Edit tool to make changes or add missing information.
Manage Your Privacy Settings
Your privacy settings determine whether or not you appear in the online & print directory. Scroll down to the FAQs to learn more about Realm and privacy.
Privacy settings
Mobile View
1. On your mobile device or tablet, tap the “☰” menu at the top left corner of your screen.
Privacy settings
Mobile View
1. On your mobile device or tablet, tap the “☰” menu at the top left corner of your screen.
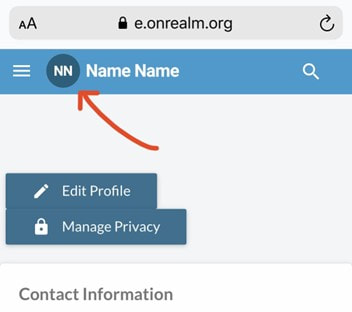
2. At the bottom of the expanded menu, you will see a circle with your initials in it. Tap this circle.
3. At the top of the expanded menu, tap Manage Privacy.
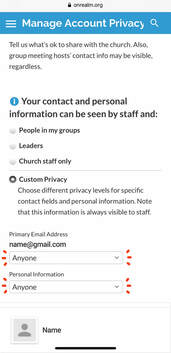
4. Now you are on the Manage Privacy screen. By selecting Anyone in the church, your profile will be visible to other parishioners in both the online & print directory. On mobile view, this can be accomplished by selecting Custom Privacy and then Anyone / Anyone.
Privacy settings
Desktop View
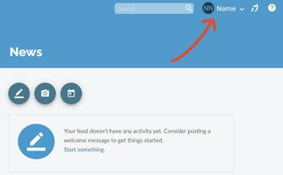
1. On your computer, at the top right corner of the screen, next to the search bar, you will see your first name. Click here.
Privacy settings
Desktop View
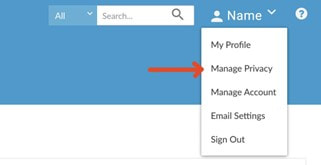
1. On your computer, at the top right corner of the screen, next to the search bar, you will see your first name. Click here.
2. After you click on your name, a dropdown menu will appear. At the top of the dropdown menu, select Manage Privacy.
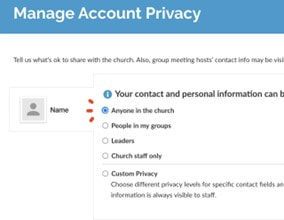
3. Now you are on the Manage Privacy screen. By selecting Anyone in the church, your profile will be visible to other parishioners in both the online & print directory.
Add a Photo
Adding a photo will help parishioners identify you in the directory.
Adding a photo
Mobile View
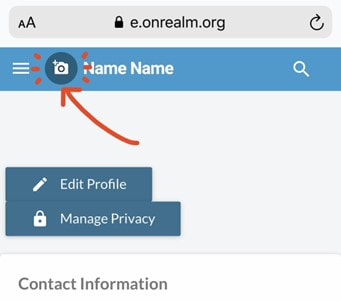
1. At the top of your profile page, within the blue header bar, you will see your name next to a small circle with your initials in it. Tap the circle.
Adding a photo
Mobile View
1. At the top of your profile page, within the blue header bar, you will see your name next to a small circle with your initials in it. Tap the circle.
2. Once you tap the circle, an icon of a camera will appear over the circle. Tap it once more. Follow the prompts to add a profile picture.
3. You can also add a family photo, which will appear next to your family’s entry in the print directory. Please visit Realm on your desktop computer to complete this step.
Adding a photo
Desktop View
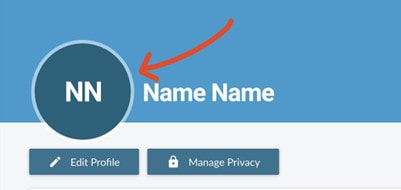
1. At the top of your profile page, within the blue header bar, you will see your name in big bold letters next to a large circle with your initials in it. Bring your cursor to the circle.
Desktop View
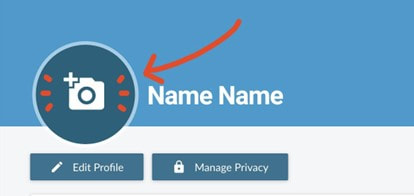
1. At the top of your profile page, within the blue header bar, you will see your name in big bold letters next to a large circle with your initials in it. Bring your cursor to the circle.
2. Hover over the circle and click. Follow the prompts to select a file upload for your profile picture.
Adding a family photo
Desktop View
You can also upload a family photo. If we decide to print directories, this will be printed next to your family’s entry in the directory.
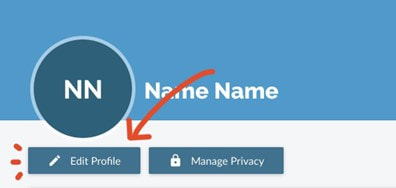
1. This time, on your profile page, select Edit Profile.
Desktop View
You can also upload a family photo. If we decide to print directories, this will be printed next to your family’s entry in the directory.
1. This time, on your profile page, select Edit Profile.
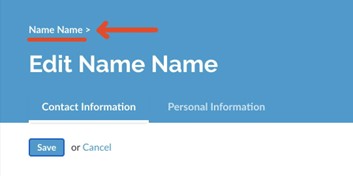
2. On the Edit Profile screen, you will see your name in small letters above the heading. Click on your name as it appears here.
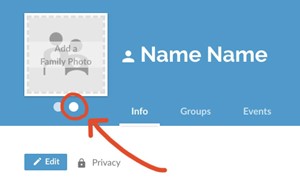
3. This time your profile photo will appear in a square frame. Two dots sit below the frame. Click the dot on the right and the text within the square frame will now read Add a Family Photo. Click anywhere within the square frame and follow the prompts to add your family photo. This photo will not display on your profile, but it will appear next to your family’s entry in the directory when and if it is printed.
Register for Classes, VBS, etc.
Registration
Mobile View
On your mobile device, tap the “☰” menu. The main menu will now appear on the left side. Select Events. This will bring you to a landing page where you can register for classes, etc.. Note: Only classes requiring registration will appear.
Mobile View
On your mobile device, tap the “☰” menu. The main menu will now appear on the left side. Select Events. This will bring you to a landing page where you can register for classes, etc.. Note: Only classes requiring registration will appear.
Registration
Desktop View
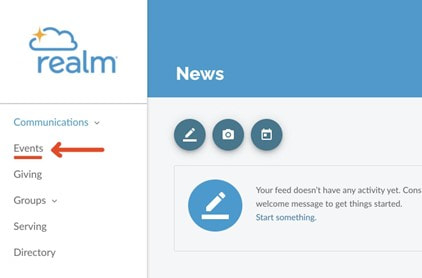
On your computer, select Events from the main menu on the left side. This will bring you to a landing page where you can register for classes. Note: Only classes requiring registration will appear.
Desktop View
On your computer, select Events from the main menu on the left side. This will bring you to a landing page where you can register for classes. Note: Only classes requiring registration will appear.
View the FSFUMC Directory
FSFUMC Directory
Mobile View
On your mobile device, tap the “☰” menu. The main menu will now appear on the left side. Select Directory. Those who have adjusted their privacy settings to be visible to all will appear.
Mobile View
On your mobile device, tap the “☰” menu. The main menu will now appear on the left side. Select Directory. Those who have adjusted their privacy settings to be visible to all will appear.
FSFUMC Directory
Desktop View
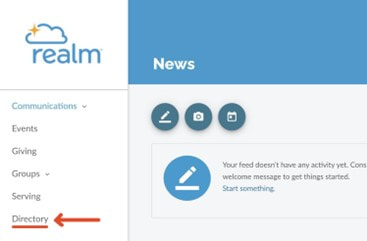
On your computer, select Directory from the main menu on the left side. Those who have adjusted their privacy settings to be visible to all will appear.
Desktop View
On your computer, select Directory from the main menu on the left side. Those who have adjusted their privacy settings to be visible to all will appear.
If you’re looking for someone and can’t find them -
Privacy settings determine whether or not someone appears in the directory, and a person must manually adjust these settings themselves to be included. We respect your privacy and will not publish personal information without your consent.
Privacy settings determine whether or not someone appears in the directory, and a person must manually adjust these settings themselves to be included. We respect your privacy and will not publish personal information without your consent.
View Your Giving History
Giving History
Mobile View
On your mobile device, tap the “☰” menu. The main menu will now appear on the left side. Select Giving. This information is only visible to you, the Finance Assistant, and the Business Administrator.
Mobile View
On your mobile device, tap the “☰” menu. The main menu will now appear on the left side. Select Giving. This information is only visible to you, the Finance Assistant, and the Business Administrator.
Giving History
Desktop View
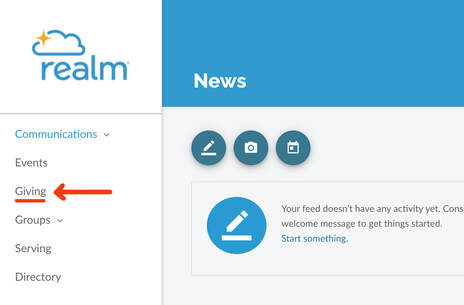
On your computer, select Giving from the main menu on the left side. This information is only visible to you, the Finance Assistant, and the Business Administrator.
Desktop View
On your computer, select Giving from the main menu on the left side. This information is only visible to you, the Finance Assistant, and the Business Administrator.
Realm User Agreement
As a member / friend of Fort Smith-First United Methodist Church, the personal contact information contained in FSFUMC’s Realm is to be maintained as private and confidential. As a member of the community, you are also responsible for keeping the online environment safe. Toward that end, by logging into FSFUMC’s Realm, you agree to the following:
- You agree that the username and password issued to you is for your personal use only. You will not share the username and/or password with any other individual.
- You agree that you will not use contact information from FSFUMCs Realm for any commercial purposes, to engage in illegal, immoral, fraudulent or malicious conduct, or to annoy or harass persons listed.
- And you agree that if you see inappropriate or questionable use of the FSFUMC Online Photo Directory, that you will contact the church office.
Privacy Information and Settings
Your information is your information.
You have complete control over who can see your contact and personal information.
- Contact information is never public or searchable on the Internet. Any information you elect to make visible to your church family is always protected behind a login.
- Authorized staff will always have access to your profile information.
- You and certain authorized staff may update your profile information. In some cases, your group leader may update your contact information if you have made it visible to group leaders.
- For safety reasons, sharing contact and personal information for children under 18 is limited.
- Parents determine whether or not to display their child’s name in the church directory.
- Children under 13 may not participate and will not be able to sign in.
- What people may see.
- Contact Information: Name, Address, Phones, and Email.
- Personal Information: Marital Status, Family Position, Member Status, but you also have the option of sharing your birthday, gender, allergy information, and skills with people in your church.
- If you are a group leader or host an event, certain contact information may be visible regardless of the settings you choose.
Privacy Settings
Everyone—Like a church directory listing, everyone in our church will be able to see whatever profile information is marked as visible to everyone.
My Groups + Group Leaders + Church Staff—This setting means information will only be shared with the people you are involved with at church. This is the default setting.
Group Leaders + Church Staff—You would use this setting if you wanted to keep some profile information hidden from anyone who is not a group leader or on staff.
Church Staff Only—This setting effectively removes you from the church directory. Your information will only be available to authorized church staff.*
Custom Privacy—Choose different privacy levels for specific contact fields and personal information. You can do this in two places: when you edit your profile information or when you manage your privacy settings.
Family Privacy—A family member with a primary position such as “Head” or “Spouse” can change privacy settings for other members of the family and opt family members into the church directory.
Birthdays are required for children (as a means to prohibit access), but it’s up to you if you want to share the birth date with your church family.
